Hi Everyone,
Today I am going to give steps on How to root Huawei Honor H60-L04 (Indian Version)?. This will enable the Root Access and will not upgrade your Android Version. I have successfully rooted my Huawei Honor 6 with the below steps. All the credits for the process goes to the thread posted in Huawei Honor Club Forum.
Warning: Before we start with the process, I would like to inform you that I or this site will not responsible for any data loss, if you make any mistakes and Bricked Device. Rooting the phone will void the warranty.
I have divided the process into below 5 activities.
A. Getting Unlock Password
B. Downloads
C. Preparing the Phone
D. Unlock Boot Loader
E. Installing CWM Recovery
F. Backing Up and Flashing SuperSU.
Okay ! lets begin the process.

2. Select HUAWEI C8812 (or whichever we can change this)
3. Right click the selection and choose Inspect Element

4. Double click HUAWEI C8812 and Type H60-L04 and hit Enter. Your Product Model should get changed.


5. Enter Product Serial. Settings - About Phone - Status

6. Enter Product IMEI - *#06#
7. Enter Product ID - *#*#1357946#*#*
8. Enter Verification Code and Submit
9. Your will get the 16 digit unlocking password - Note it down safely.
2. Download Honor 6 Multi Tool
3. Extract Honor 6 Multi Tool.zip and get the SuperSU.zip (Do not unzip SuperSU.zip) from the tools folder and put it on your phones internal memory card.


2. Run HONOR 6 Multi-Tool v2.00.bat on your computer

3. Type 1 to select Bootloader, Type 2 to select Unlock Bootloader.


4. Enter your 16 Digit Unlock code and press enter. Your phone is now unlocked.


2. Open Multi-Tool and select Option 2 for Recovery and then Option 1 to install CWM. (You need to be connected to internet and this will take a few minutes)

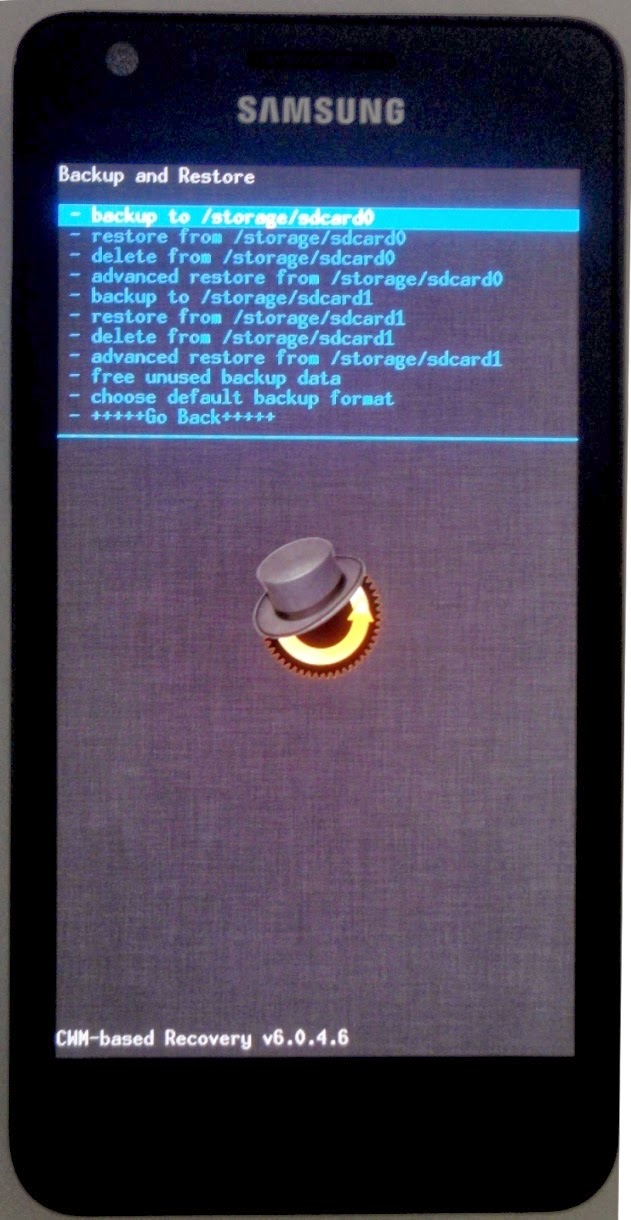
After the CWM installation, you will get the screen as below.

2. Boot your phone in Fast Boot mode (Note: If your phone is stuck in Fast Boot mode at any time press Volume UP+Volume Down+Power all at once to reboot the phone.)
3. Open Multi-Tool and select option 3 - Root and select Option 1 - I have CWM Installed.

4. Boot your phone in CWM reovery (Volume UP+Power) go to Install Zip from SD Card and choose SuperSU.zip which was copied to your phone internal SD card and install it.

5. The phone may ask "Root may be list! Restore Now?" Select NO
6. Restart the phone from CWM recovery and you should have SuperSU on your phone.
Congratulations! Your phone is now rooted.
Today I am going to give steps on How to root Huawei Honor H60-L04 (Indian Version)?. This will enable the Root Access and will not upgrade your Android Version. I have successfully rooted my Huawei Honor 6 with the below steps. All the credits for the process goes to the thread posted in Huawei Honor Club Forum.
Warning: Before we start with the process, I would like to inform you that I or this site will not responsible for any data loss, if you make any mistakes and Bricked Device. Rooting the phone will void the warranty.
I have divided the process into below 5 activities.
A. Getting Unlock Password
B. Downloads
C. Preparing the Phone
D. Unlock Boot Loader
E. Installing CWM Recovery
F. Backing Up and Flashing SuperSU.
Okay ! lets begin the process.
A. Getting Unlock Password
1. Apply for the unlocking password for your device on EmotionUI - Unlock Bootloader (Use Chrome Browser)2. Select HUAWEI C8812 (or whichever we can change this)
3. Right click the selection and choose Inspect Element
4. Double click HUAWEI C8812 and Type H60-L04 and hit Enter. Your Product Model should get changed.
5. Enter Product Serial. Settings - About Phone - Status
6. Enter Product IMEI - *#06#
7. Enter Product ID - *#*#1357946#*#*
8. Enter Verification Code and Submit
9. Your will get the 16 digit unlocking password - Note it down safely.
B. Downloads
1. Download and Install HiSuite (This is important so that your PC gets the required drivers installed)2. Download Honor 6 Multi Tool
3. Extract Honor 6 Multi Tool.zip and get the SuperSU.zip (Do not unzip SuperSU.zip) from the tools folder and put it on your phones internal memory card.
C. Preparing the Phone
1. Enable Developer Mode on your phone. (Go to Setting - About Phone - Tap Build Number 7 times). Then go to Settings - Developer Options - Enable USB Debugging.D. Unlock Boot Loader
1. Power Off your phone and press Volume Down and connect USB to computer (while pressing down Volume Down) to enter Fast Boot mode. You can see the message "Phone Locked" or "Locked"2. Run HONOR 6 Multi-Tool v2.00.bat on your computer
3. Type 1 to select Bootloader, Type 2 to select Unlock Bootloader.
E. Installing CWM Recovery
1. Start your phone in Fast Boot mode. You can see the message "PHONE Unlocked" and this is the indication that the Bootloader is unlocked.2. Open Multi-Tool and select Option 2 for Recovery and then Option 1 to install CWM. (You need to be connected to internet and this will take a few minutes)
F. Backing Up and Flashing SuperSU.
1. Boot your phone in CWM Recovery by pressing Volume Up+Power and save a backup of your phone system and data. (This takes some time depending on the data)2. Boot your phone in Fast Boot mode (Note: If your phone is stuck in Fast Boot mode at any time press Volume UP+Volume Down+Power all at once to reboot the phone.)
3. Open Multi-Tool and select option 3 - Root and select Option 1 - I have CWM Installed.
4. Boot your phone in CWM reovery (Volume UP+Power) go to Install Zip from SD Card and choose SuperSU.zip which was copied to your phone internal SD card and install it.
5. The phone may ask "Root may be list! Restore Now?" Select NO
6. Restart the phone from CWM recovery and you should have SuperSU on your phone.
Congratulations! Your phone is now rooted.