Hi Friends,
I am going to walk you through how you can root Samsung Galaxy SII and install custom ROM on it such as ever popular CyanogenMod?
Before we gonna install custom ROM, we have to root the phone.
What is rooting?
The android phones are based upon the Linux Operating System. Only admin have the access to the root of the operating system. The process of giving root access or privilege to the all users and other applications in the operating systems is called rooting. Rooting the phone gives you power to change almost all aspects of the system and also gives you the necessary permissions to install the custom ROMs.
Statutory Warning: This site will not be responsible for any data loss if you make any Mistakes and Bricked Devices. If you root your phone, it will void the warranty.
Before we start with the rooting and Custom ROM installation, lets understand what are the resources required for the process and all the resources are available in the zip. Download it now.
1. Required for Rooting
1.1. GT-I9100_JB_ClockworkMod-Recovery_6.0.2.9.tar
1.2. Odin307.zip
2. Required for Custom ROM Installation
2.1. cm-10.2-20140126-NIGHTLY-i9100.zip
2.2. gapps-jb-20130813-signed.zip
2.3. CWM-SuperSU-v0.97.zip
3. Required Post-Installation
3.1. TriangleAway-v3.26.apk
4. Required Pre-Installation Check
4.1. RootCheckPro.apk
Hereafter I will refer the files with thier reference numbers like 1.1, 2.3, 3.1, etc.
Now I will let you know what are all the preparation required before starting the process.
1. Before we go any further put the files 2.1, 2.2 and 2.3 in Internal SD Card of your phone. If your phone have an External SD Card, preferably you can put the files there also.
2. Root Access can be checked by Installing the Android App in the section 4.1. This app will show whether the phone is rooted or not. This step is not mandatory. But just to check the Root Access Status.
3. Make sure phone has sufficient battery backup. Preferably not less than 90%.
Now lets begin the actual process. I would request you to read each steps carefully and follow.
1. Turn the phone off and make sure it is fully off. To make sure it is off, you can even pull the battery out and put the battery back. Dont turn it on now. Keep the phone aside and follow the next step.
2. Unzip the archive 1.2 and open the application Odin3 v3.07.exe
3. Connect the USB Cable to the computer, Do NOT connect to the phone now.
4. In Odin3 v3.07 application, Click the PDA button and select the GT-I9100_JB_ClockworkMod-Recovery_6.0.2.9.tar, Make sure only "Auto Reboot" and "F. Reset Time" options are selected and also make sure NOTHING is selected in the "PIT".

5. Now you turn on the phone in "Download Mode" by pressing Power Key + Home Key + Volume Down Key together for few seconds. Now we have the below screen.

6. Now press the Volume Up Key to continue to the "Download Mode".

7. Now connect the USB Cable to the phone and start flashing new kernel with the Odin. When you connect the USB Cable a Blue color will appear with the COM Port number as highlighted below.

8. If the Blue Color is appeared then press the "Start" button to start flashing the kernel. Below are some of the intermediate and final Odin screens.


9. After the flashing the phone will start rebooting. Prevent the booting by pulling out the battery. Put the battery back and follow the steps.
10. Now you turn on the phone in "Recovery Mode" by pressing Power Key + Home Key + Volume Up Key together for few seconds, the Samsung Logo with a yellow triangle will flash couple of times, keep holding the keys and finally we will have the recovery screen as below.

Now lets understand how to navigate the interface in Recovery Mode.
- Volume Up Key - Scroll Up
- Volume Down Key - Scroll Down
- Power Key - Make your Selection
Some common understandings about the interface.
- "+++++ Go Back +++++" is the option in the interface to go back to the previous screen.
- "Install Zip" is the option used to install any zip file from the internal/exteranl storage.
- "sdcard0" is the internal card and "sdcard1" is the external card.
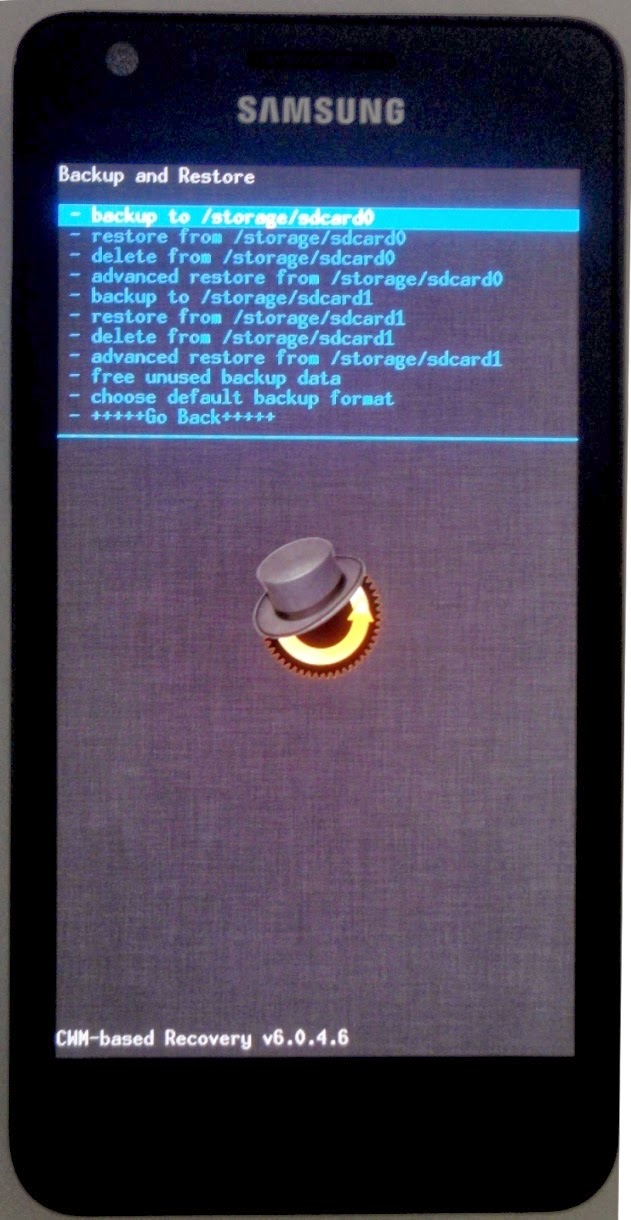
- "backup and restore" is the option to backup/restore the ROM.
Now we will continue the custom ROM installation.
11. First of all we will start process by backuping the existing ROM. Select the "backup and restore" option from the basic menu, from the "backup and restore" menu select "backup to /storage/sdcard0" (Internal) or "backup to /storage/sdcard1" (External) depend upon where do you want to backup the ROM. It may take 2-5 minutes.
12. After the backup is completed, select the "install zip" option, then now select "choose zip from /storage/sdcard0" (Internal) or "choose zip from /storage/sdcard0" (External) depending upon from where do you want to select the installation files, select the "CWM-SuperSU-v0.97.zip", now select "Yes - Install CWM-SuperSU-v0.97.zip" option to confirm and installation may take 2-3 minutes to complete.

13. Repeat the process to install "cm-10.2-20140126-NIGHTLY-i9100.zip" and then "gapps-jb-20130813-signed.zip". With this we have completed the installation. We have to do couple of more steps to complte the process.
14. Do a complete restore of the phone by selecting the option "wipe data/factory reset" option from the home menu. Before we do this make sure you have backed up the existing ROM explained in the step 11. Select option "Yes - wipe all user data" to begin the factory reset process. It may take a minute to complete.
15. Wipe the cache partition by selecting the "wipe cache partition" option, select "Yes - wipe cache" to confirm the process.
16. And finally from the advanced menu select the "wipe dalvik cache" option to wipe the dalvik cache.

17. Now we are ready to boot to the CynogenMod. Select "reboot system now" option to reboot the phone. Now you will see the Samsung Galaxy screen with yellow triangle and later CyanogenMod boot screen. Your phone is now rooted and running Cyanogen ROM instead of Stock ROM (Samsung Pre-installed ROM). Now you will prompted to sign in to Google Account and CynogenMod Account. You can skip this or you can enter the credentials to login.
18. We are coming to the completion of the installation. Only thing left for us is removing the yellow triangle we saw in the Samsung Boot screen. Follow the simple steps to do this. Please do not reboot the phone unless until the TriangleAway step is completed.
19. Install the TriangleAway-v3.26.apk Android App either from the sdcard or Google Play Store, open the application, you may be prompted to give super user access, provide the access.
20. It will show a popup to confirm your phone model. In this case it is "GT-I1900", press "Continue", Press "Ok", Press "Ok" and Press "No Thanks" for succeeding popups.
21. Now press the "Reset Flash Counter" option, it will give you a warning, press "Continue", the phone will be rebooted into a reset flash counter mode (Almost like Download Mode), press the "Volume Up Key" to reset the counter, once the reset is done press the "Volume Up Key" again to reboot the phone normally and now you see that the Yellow Triangle has gone.
Here is your rooted phone with Custom Cyanogen ROM ! Keep reading my blog, like and share if it really helped you. Thanks


